Powered By Blogger
Showing posts with label microbeads. Show all posts

Tuesday, August 25, 2020

Reneabouquets Design Team Page, Sleep And Dream, by Melissa Larson


Hi everyone! Melissa here with a new page for the amazing Reneabouquets. Go and see all the fun treasures there!

Photo credit:Unsplash

@mlarson525 I have a 29 second Instagram video of when I started painting this page.


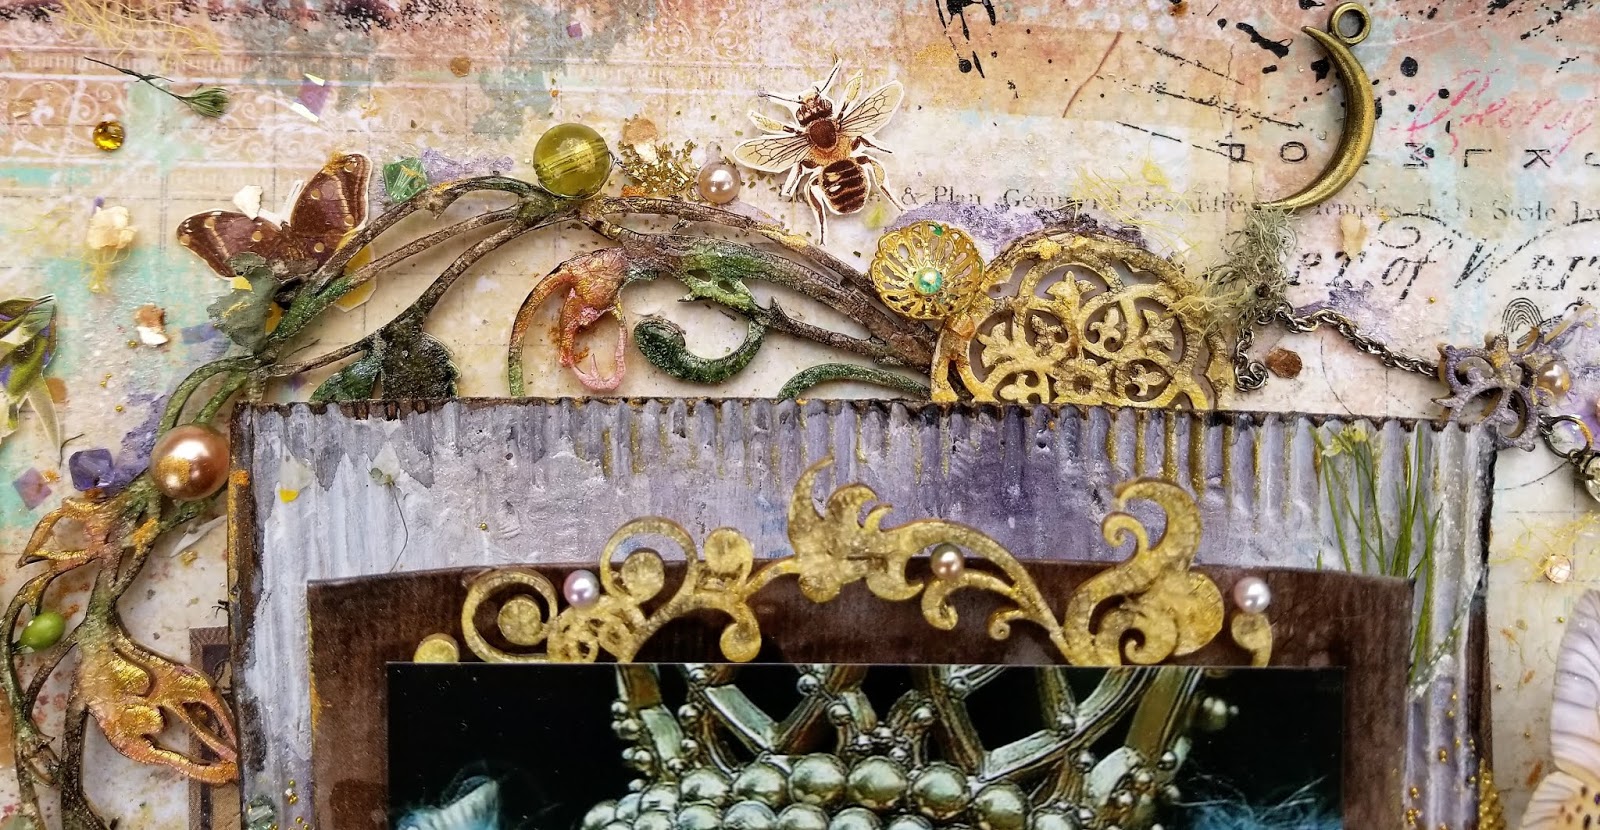
To make this page I applied clear gesso to 49 and Market paper. I put the layers under the photo together,starting with taping on watercolor paper under the image to make it stronger. Below that is a mat of watercolor paper, and under that is corrugated cardboard. I tore off most the paper from the surface of the cardboard, and painted it with gesso. I put two or three layers of corrugated cardboard between each layer to add dimension. 

I put the layers with the photo onto the page. I applied Prima Platinum Crackle Paste with a stencil to the paper with an old credit card. 

I picked out Beautiful Board(BBoard),prepped it with gesso, painted it with green and gold Shimmerz on the leaves and stars, and topped them with a thick coat of Clear Rock Candy Crackle. I painted the BB Small Stackable Honey Bee Pattern with Pixie Dust Shimmerz, then a little green Shimmerz and some crackle.I added a few pieces of Sweet Daisy BBoard.


To add visual interest I added micro beads, seed beads,glass glitter, glass beads, pearls, Swarovski crystals, rhinestones,sequins,gold leaf, pressed flowers and leaves,tulle,iridescent wrapping paper, flowers from Reneabouquets , metal from Reneabouquets, clay pieces from a Prima Mould,a glass bottle I put some chain inside,and bling and metal from my stash. There are small fussy cut pieces from Graphic 45 papers.

I made the background with layers of Shimmerz paints, white ink,Prima waxes,alcohol ink, distress ink, and citrine colored Mica powder. I topped a lot of the page with a gold paste by Shimmerz. I added white gesso to make some negative space, because the page got too busy. I flicked on white ink at the end.

I glued on iridescent wrapping paper on the copper spoon, and glued moonstones on top. I wrapped on some copper wire. I added shimmerz paint, prima waxes, and mica powder. The little orange things are seeds from a flower from a bunch that my husband surprised me with a few weeks ago.


Monday, March 11, 2019

Live, Create, Tell The Story


Hi everyone! Here's my new design team page for the amazing Shimmerz Paints! I have used a photo from free google, by A.M. Lorek.


To make this page I applied clear gesso to Blue Fern paper, Happy Accident 2. I put texture paste on with a Celtic stencil from TCW,then put the layers with the photo together. I tore off parts of the surface paper of corrugated cardboard, and painted it with gesso, I added the photo with a layer of cardstock taped on, then watercolor paper. I put foam core board between everything to add dimension, and to allow room to tuck things into.


I picked out chipboard from Reneabouquets, and painted it with a mix of Green Olive , and Christmas Cheer Shimmerz. I also used a little Penny For Your Thoughts and Imperial Amethyst Inklingz. I dropped wet paint into wet paint as my technique. I dribbled on a thick layer of Clear Rock Candy Crackle with a paintbrush. On the watercolor paper under the photo I used Steely Blue Eyes , Olive U Truly, and the Penny Inklingz. 


The purple above the photo is Honeymoon Inklingz, and Steely Blue Eyes. 


To add visual interest I applied micro beads, seed beads, glass glitter, mica flakes, pearls, sequins, rhinestones, Swarovski crystals, glass pebbles, shells, pressed flowers, lichen, and leaves, a pinecone, Prima flowers, a butterfly from Reneabouquets, Tim Holtz, Prima, and Vintaj metal, and chain and bling from my stash.


I glued on small pieces of gauze I dyed with Christmas Cheer, and the green color is Green Olive and the Penny. 


The little moth at the bottom is Tim Holtz washi tape.

Thank you so much for looking, and have a great week!


Tuesday, March 5, 2019

Look For The Magic


Hi everyone! Melissa here with a design team page for Reneabouquets!  I love all the amazing things there! This photo is from free google, by A.M. Lorek. 


To make this page I applied clear gesso to Happy Accident 2 paper, by Blue Fern. I put texture paste on with a stencil, then put the layers under the photo together. I taped on cardstock underneath the image to make it stronger, below that is a lahyer of watercolors paper. At the bottom is corrugated cardboard. I had torn off most of the paper from the cardboard, and painted it with gesso. I put layers of foam core board between the layers to add dimension.


I picked out Beautiful Board (B Board), painted it with Shimmerz Paints, and topped it with Clear Rock Candy Crackle. 


To add visual interest I added micro beads, glass glitter,mica flakes,small pieces of iridescent wrap, sequins, seed beads, pearls, Swarovski crystals, glass beads,a brad,pressed flowers, moss,lichen, a 49 and Market flower, a Reneabouquets butterfly, metal from Renea,Vintaj, Prima, Tim Holtz,bling from my stash, shells, and glass pebbles. There are a few fussy cuts pieces from Prima Spring Farmhouse, and a piece of  Stamperia Alchemy paper. I used some pieces from floral picks.


I love using pressed flowers, they add delicate texture, color, and soften the even shapes of the other elements.


I dabbed on some glossy accents and then mica powder under the glass pebbles. I painted the raised areas of the texture paste with Shimmerz. 


I added Shimmerz and beads on the cardboard, and painted the edges of the layers with paint, black gesso, and swiped on gold mica powder. 
The Tim Holtz tag has Stamperia paper on it, topped with Dimensional Accents.


I dyed gauze with gold, and other pieces with a mix of green and brown. I glued on small pieces of it on the page.


I patted on gold mica powder all around on the different items, to sort of tie things together. 
Thank you so much for looking, and have a great week!


You can find Reneabouquets here...

Reneabouquets items I used:


Tuesday, November 6, 2018

Fairy Lantern


Hi everyone! Melissa here with a Beautiful Board Explosion Ornament from Reneabouquets!  I love all the intricate cuts on this piece, they are just so beautiful. I'm going to hang this on my Christmas tree, and til then I'll have it on display in my kitchen.


To make this ornament I prepped all sides with gesso. To put it together I put the ballerina on with the stand that's provided. I took the bottom piece by the handles,and lifted it up as far as it would go. It fits around the piece with the ballerina on it, a little like putting a leg warmer on.   Beautiful Board Ballerina Explosion Ornament, Box,Gift Holder  If you go to that link, you can see more directions and photos.


I put the butterflies on first, and worked around them. To add visual interest I added microbeads, seed beads, crystals, glass beads,pearls, metal glitter, glass glitter,distress glitter,sequins, moss, lichen,pressed flowers, paper flowers,tulle, cheesecloth, silk ribbon.I used Glossy Accents to attach everything. I fussy cut pieces from Graphic 45 Fairy Frost.I used pale colors of Shimmerz Paints, mica powder,and Art Alchemy paints. 


I left the other two sides of the box plain, with just a coat of pale pink paint.


Here's a close up where you can see the B Board in more detail. 


This is the opposite side.

Here are the items from Reneabouquets that I used:


Thank you so much for looking,and have a great week!


You can find Reneabouquets here...

Reneabouquets

Reneabouquets Etsy Shop

Reneabouquets Blog

Reneabouquets Facebook Page