Powered By Blogger

Wednesday, October 29, 2014

Picking Pumpkins


I did this with watercolors. I put puddles yellow around the edges, and orange in the middle. I took a straightpin and pulled the orange paint into the yellow.

Wednesday, October 22, 2014

Happy New Year!


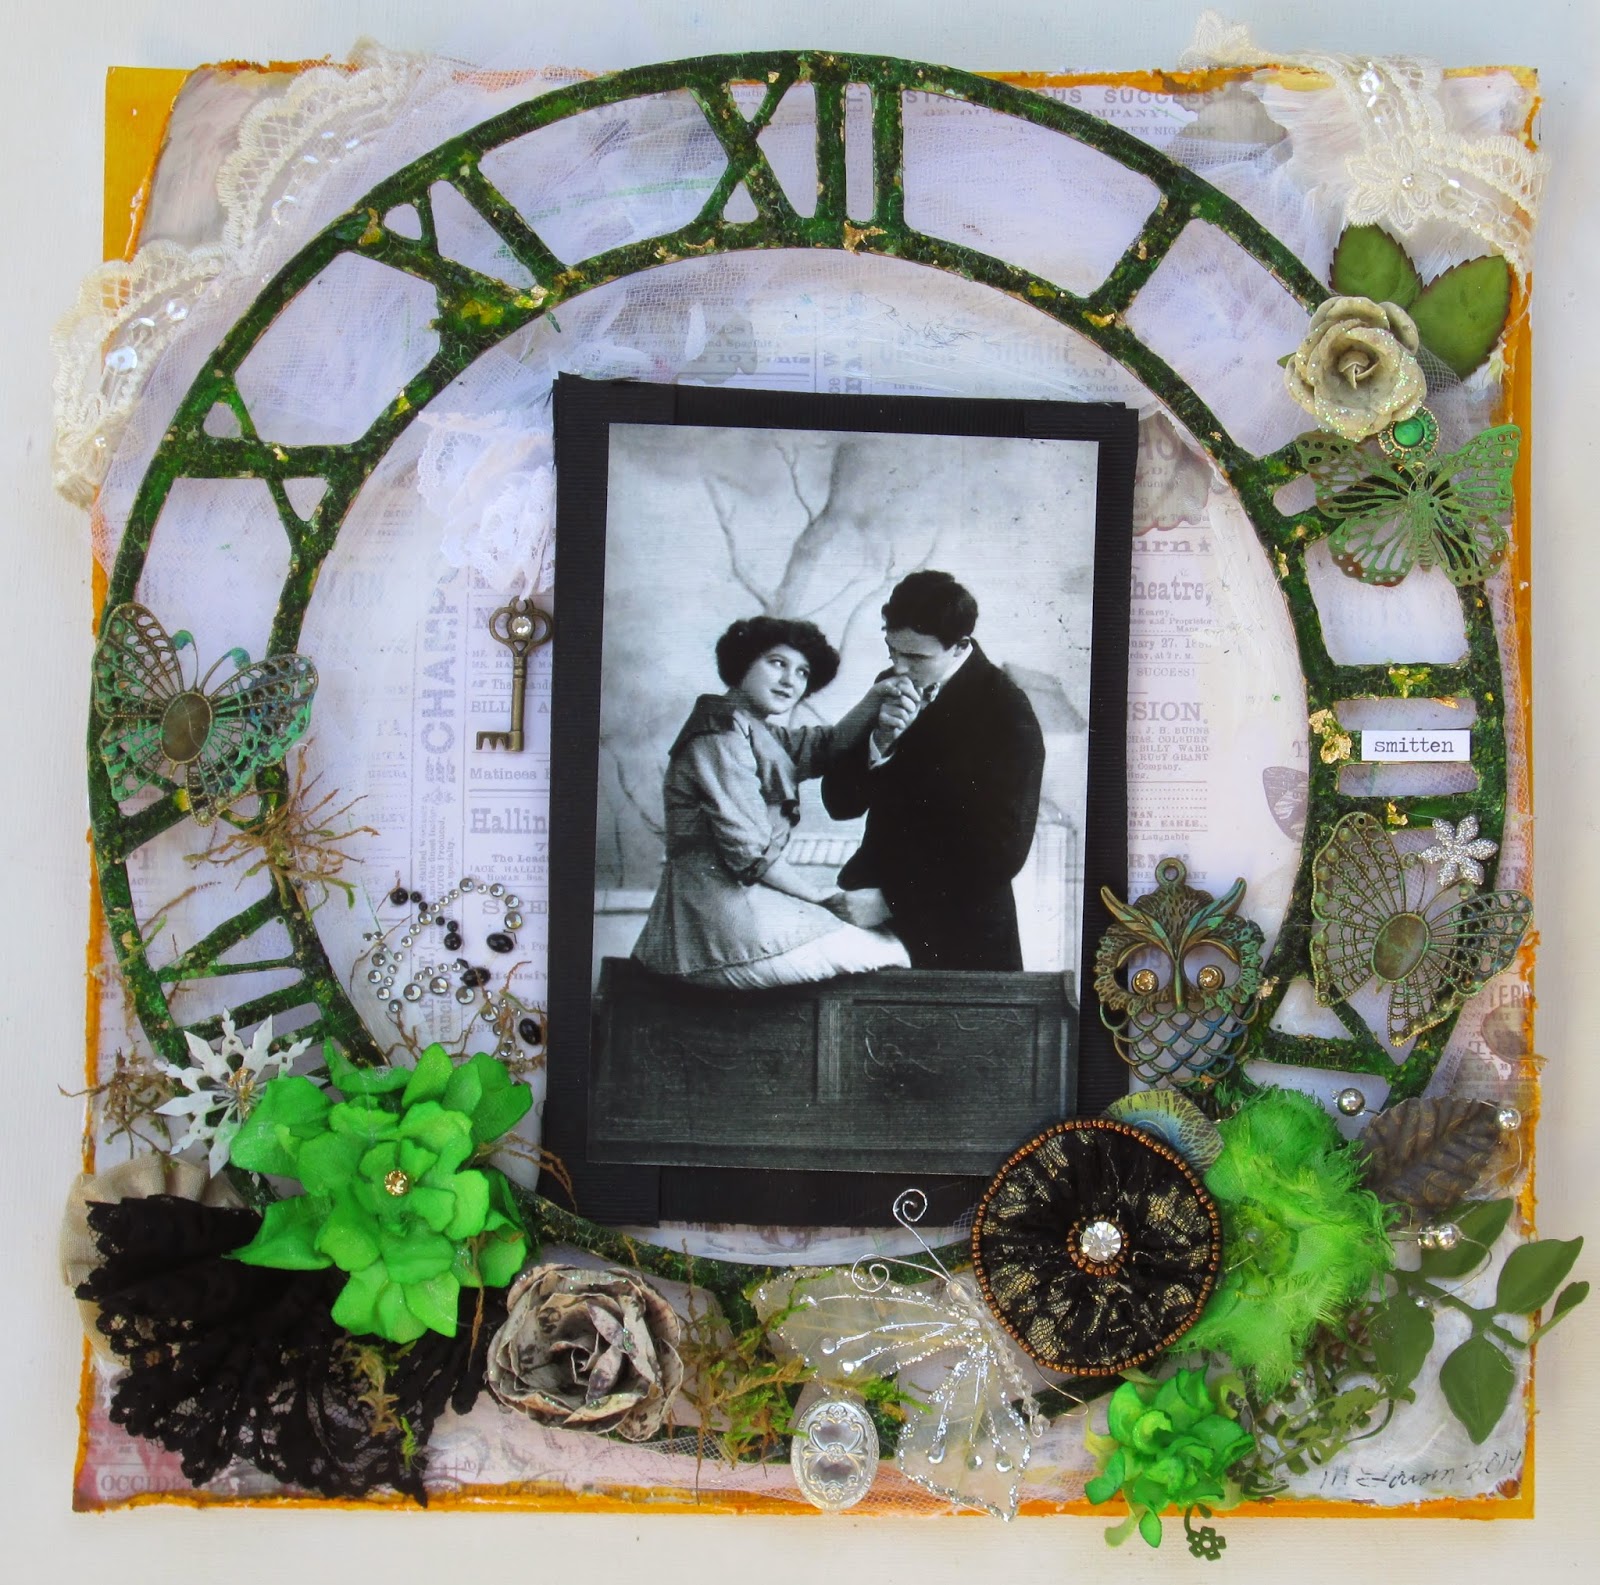
Hi everyone! Melissa here with a 12 x 12 mixed media layout for Gina's Chipboard Laser Designs.  I have titled this layout "Happy New Year".

This leaf frame is so beautifully designed.  When I saw it, I had to use it.

I always enjoy trying different ways to decorate these little beauties. Here are the steps:

1. Apply gesso.
2. Apply green chalk ink.
3. Randomly stamp on Distress Inks in Vintage Photo, and Peeled Paint.
4. Sprinkle Utee on and heat.
5.The Utee hadn't stuck too well,on the left side, so I experimented by putting on a thick layer of Crackle Accent, on the left side.
6. Dry brush gold leaf ink lightly all over, leaving most of the green exposed.


Thanks for looking!

Gina's Designs Products Used::

Flourished Frame - Bella (coming soon)

Other:
Prima paper
The Crafter's Workshop, Mini Branches Reversed
Distress Crackle Paint - Clear Rock Candy, by Ranger
Tim Holtz Distress Inks in Peeled Paint  and Vintage Photo
Vintaj bead caps and leaf
Lumiere Acrylic paint in gold
Tim Holtz rub ons
Tresors De Luxe lace
Winton and Lewis watercolors
Flowers by Prima
Plaid Liquid Leaf gold paint
A few Swarovski pointed back crystals
Tsukineko chalk ink
Luminarte Twinkling H20s
Melt Art Ultra Thick Embossing Powder


In the sun


Tuesday, October 21, 2014

Happy Birthday


This is my husband and son in my kitchen, a long time ago. 

I did this for the Challenge at Scraps of Darkness and Scraps of Elegance using their inspiration board. 

Here are items I used from my scrappy friends at sb.com: 

Abbygirl-the big blue velvet flower, and the the beige flower 
Cindy JK-the oval blue mirror piece underneath the blue flower 
Eapipkin-the blue lace on the left side 
48SixTime-the blue beads on the wire at the bottom right hand corner of the picture. 
Lynne J-the canvas flower under the blue flower 
My sis-the blue and gold glass swirl under the blue flower 
Quick Silver-the small silver key under the blue flower 
SheilaMarie-the green foliage under the beige rose. 

Thank you ladies! 

The chipboard is from Gina's Designs. I used a steampunk heart as a stencil at the upper right. On the left I used a different piece with gears.

Wednesday, October 15, 2014

Christmas Cards

Hi everyone! Melissa here with two Christmas cards for Gina's Chipboard Laser Designs.

I made these for the Christmas card swap with the other Design Team members.  These are two of the five cards that that I'll be swapping.

I first prepped the chipboard with gesso. The snowflakes at the upper right hand corners on both cards were coated with Crackle Accent, followed by a layer of silver ink. The snowflake at the bottom of the card on the right, has diamond Stickles on it. I also put the same stickles on the wing on the card at the left,and on the cut up snowflake on the same card.


Thanks for looking!

Chipboard used:

Other:
 Jaquard Pearlex Powder in silver
Swarovski Pointed Back Crystals
Viva Modeling Cream in pearl
Viva Color Precious Metal Effect Paint in white, and blue lagoon
Clear Rock Candy Crackle Accents
Stickles in diamond, and silver
K and Company Paper
Vintaj pewter leaf
Some of the flatback blue crystals are Swarovski
Some of the bling and pearl swirls are Prima


Here are some close ups:


Wednesday, October 8, 2014

Smitten

Hi everyone! Melissa here with a 12 x 12 layout to share, which is also part of our October cross promotional for Gina's Chipboard Laser Designs, and Craftsupplies1.

I love the skeleton clock frame, and I tried to do it justice with my treatment. Here are the steps:

1. Apply gesso
2 .Paint on 3 layers of fresh cut grass Dylusions Ink . I diluted it, 3 parts ink to 1 part water.
3. Black Sharpie to all edges to give more definition.
4. Rub on silver mica powder over whole frame.
5. Apply gold rub n buff to all the edges,allowing a lot of the black Sharpie to show.
6. Dab on Bronze Distress Stickles in different places,  let dry.
7. Paint on undiluted Pure Sunshine Dylusions ink over whole frame.
8. Let the ink dry and rub on gold mica powder.
9. Dry brush gold leafing ink onto the Stickles. There will be little flecks of the texture of the Stickles that you can dry brush paint on. Brush gently so as just to touch the flecks with paint.
10. Put on little pieces of gold leaf all around the frame.
11.Using a paint brush, apply a thick layer of Crackle Accents.

  Even though this isn't a winter page I couldn't resist using the snowflake shape set.

I used some beautiful lace and metal from Craftsupplies 1. 

I lightly brushed on some Vintaj Metal Patina on the owl and butterflies.

I gave the owl Swarovski pointed back crystals for eyes.

I accordion folded the black lace, and  secured it with a straight pin.


Thanks for looking!

Chipboard:


Other:
Pink Paislee paper
Prima Flowers
Prima Butterfly
Sizzix Tattered Flower made with Big Shot, I used white handmade paper from Hobby Lobby.
Ranger Dylusions Ink in Cut Grass, and Pure Sunshine.
Rub n Buff
Black Sharpie
Gold leaf
Gold leafing ink
Silver Jaquard Pearlex
Antique Bronze Distress Stickles
Distress Crackle Paint-Clear Rock Candy
Vintaj Metal
Vintaj Metal Patina Paint
Viva Modeling Cream in pearl
Tresors de Luxe  lace


You migh


Wednesday, October 1, 2014

ATC Shrine and ATC

Hi, Melissa here for Gina's Chipboard Laser Designs

I think Gina's ATC shrines are adorable. 

I painted the shrine with the following:

1.Two coats of gesso.
2. Silver ink on the top and in various areas on the rest of the shrine.
3. Two coats of Viva Decor Modeling Cream,then Viva Decor Metallic paint on all areas except for the top.
3. A thick layer of Crackle Accents on the top.
4. A layer of watercolors,on the top. I wiped off the excess while wet , leaving just enough so the cracks would show.

I rubbed on some silver Perfect Pearls with my finger.

The chipboard on the ATC on the right was painted with gesso, then watercolors.


Thanks for looking!

Chipboard used:


Other:
Winton and Lewis Watercolors
Twinkling H20s
Viva Modeling Cream
Viva Colour Precious Metal Effect Paint
Ranger Crackle Accents
Swarovski crytals
Butterfly by Reneabouquet