Powered By Blogger

Monday, July 2, 2018

Let Your Spirit Take Flight


 Hi everyone! Melissa here with a page for Reneabouquet!  I was inspired by this photo to create a background with soft colors, and textures with swirling movement. I thought the Beautiful Board, or BB, I chose, fit the bill to reflect the elegance of the dancer.


To make this page I used a Prima stencil and applied texture paste. I used watercolors to paint everything. I have the photo mounted on watercolor paper. I put a layer of foam core board between the photo and the watercolor paper, and two layers of foam core board between that and the bottom layer. For the BB, I prepped it with gesso, painted it pink, and applied a layer of Ranger Crackle Paint. 


To add visual interest I used Glossy Accents to glue on the following,a Reneabouquet dragonfly, mica flakes, micro beads, seed beads, crystals, metal, bling, sequins,shells, glass,black tulle, gold leaf, glass glitter,lichen, feathers, pressed flowers,gold embroidery floss, and more.


Almost everything has a little gesso dry brushed on it. I added more watercolors to the BB, and kept adding layers of color to the page. 


I painted the raised areas of the texture paste with Art Alchemy Sparks Acrylic paint and watercolors too. I coated that with a thick layer of Crackle Paint. I outlined the painted areas with a detail brush and a mix of black watercolor crayon and water. I could have used black gesso but this way was less of a mess.


One of the last steps was dabbing a little gold mica powder on several areas, just to add a little extra color and shine.


Here are four photos that show the dimension more:


Here is a list of Reneabouquet products I used:


You can find Reneabouquets here:


Reneabouquets Shop-http://www.Reneabouquets.com

Thank you so much for looking, and have a great week!


Monday, June 25, 2018

Woman in Field of Sunflowers


Hi everyone! Melissa here with a page for Reneabouquets.  I love the bright sunshiny feel of this photo, and wanted to reflect that in the way I made the background. Using Renea's Beautiful Board (BB),and other items from her store, I think I was able to do that. The BB is very easy and fun to work with, the shapes are so inspiring!


To make this page, I applied texture paste with a stencil onto the paper. I figured out where I wanted to place the photo and BB, and took a photo for reference,in case I forgot my design.


I mounted the photo on watercolor paper, then taped and glued it and the BB to the page.


To add visual interest I glued on a lot of things: micro beads, seed beads, tulle, old jewelry, Beautiful Beads, crystals, mica flakes,distress glitter, glass glitter, glass beads,pressed flowers, bark, dyed gauze,shells, and sequins.


I used a lot of different mediums, watercolors, acrylics, alcohol inks, lumieres, distress ink,mica powder,and more.


For the BB I prepped them with gesso, then added green and brown watercolors. I topped them with Crackle Paint, and then added more color. These included Prima Sparks Acrylics,mica powder, and Lumieres.


Here's a list of supplies I used:


Thank you so much for looking, and have a great week!


Monday, June 18, 2018

Choose To Shine


Hi everyone! Melissa here for Shimmerz Paints, with my second page for June! 
I discovered a new favorite color, called Christmas Cheer Shimmerz. I used it all around the page, and splattered it on as well. It tied the other colors together, with its shimmery, golden yellow tones. I love using gold as a neutral color, I usually use gold mica powder, but the Christmas Cheer had just the exact color and shimmer that I needed. 


To make this page I used paper by 49 and Market. I arranged the chipboard and flowers around the photo, and took a photo for reference. I took things apart so I could work on the chipboard,
and painted them with Green Olive Shimmerz. When dry, I put on a layer of Miner Miner, 49er Inklingz. I painted on a thick layer of Clear Rock Candy Crackle, and when dry brushed on a little gold mica powder. I glued them on the page, and started adding the embellishments. 
To add visual interest I added micro beads, seed beads, glass glitter,glitter glue, distress glitter glue, distress glitter,mica flakes,tulle, Prima flowers,sequins,dried flowers,lichens,birch bark, gold leaf, pearls, charms,Tim Holtz metal,  and metal and bling from my stash.


I used Pugnacious Purple,and Imperial Amethyst Inklingz around the page on the watercolor mat. I rubbed on gold mica powder in various places on the mat and page.


There are a few layers of clear glass glitter, gesso, and paint to the right of the photo.


The sticker titles are from 7 Dots.


I used some Shimmerz stamps:


The lavender butterfly to the left of the photo is from Reneabouquets.

If you write my name in the comments section when you order, you can get a surprise freebie!


Thank you so much for looking, and have a great week!


Monday, June 11, 2018

Romance


 Hi everyone, here's my first page of the month for Shimmerz Paints! I have used a photo of my son and fiance that was professionally done.
 The quality of these paints are really good. The pale peachy color is one of my all time favorites, I use it I think on every page I've done since I started on the team in January.  It's a rich, creamy, shimmery, container of loveliness, called Dear John Letter Inklingz. It looks good enough to eat!


To make this page I did the following:
1.Put piece of cardstock under photo, adhere with double sided foam tape
2.Adhere foam core board to cardstock.
3. Adhere to watercolor paper mat.
4. Adhere 2 layers of foam core board between the mat and background paper. I used a 12 x 12 piece of watercolor paper.
4. Make some pencil marks where you want stencil to go.
Apply texture paste in a thick layer with a Prima stencil and credit card.
6. Paint stenciled areas with Dear John Letter Inklingz, when the paste is dry.
7. Apply thick layer of Ranger Clear Rock Candy Crackle to raised texture paste,after the paint is dry.
8.Paint chipboard with a mix of Emerald City Inklingz and Penny 4 Your Thoughts Inklingz,when dry apply crackle.
9. Paint area between raised areas of texture paste with Penny 4 Your Thoughts
9.Start gluing all the embellishments on.


You can see some texture on the page, I used two layers of Tidy Widy Texturez, with a layer of gesso between them. The White Tidy Widy is nice and thick, and shiny!It's similar to texture paste.
 I put a layer of Dear John Letter over the whole page. I also used it over small areas of gesso I put on almost every element on the page.
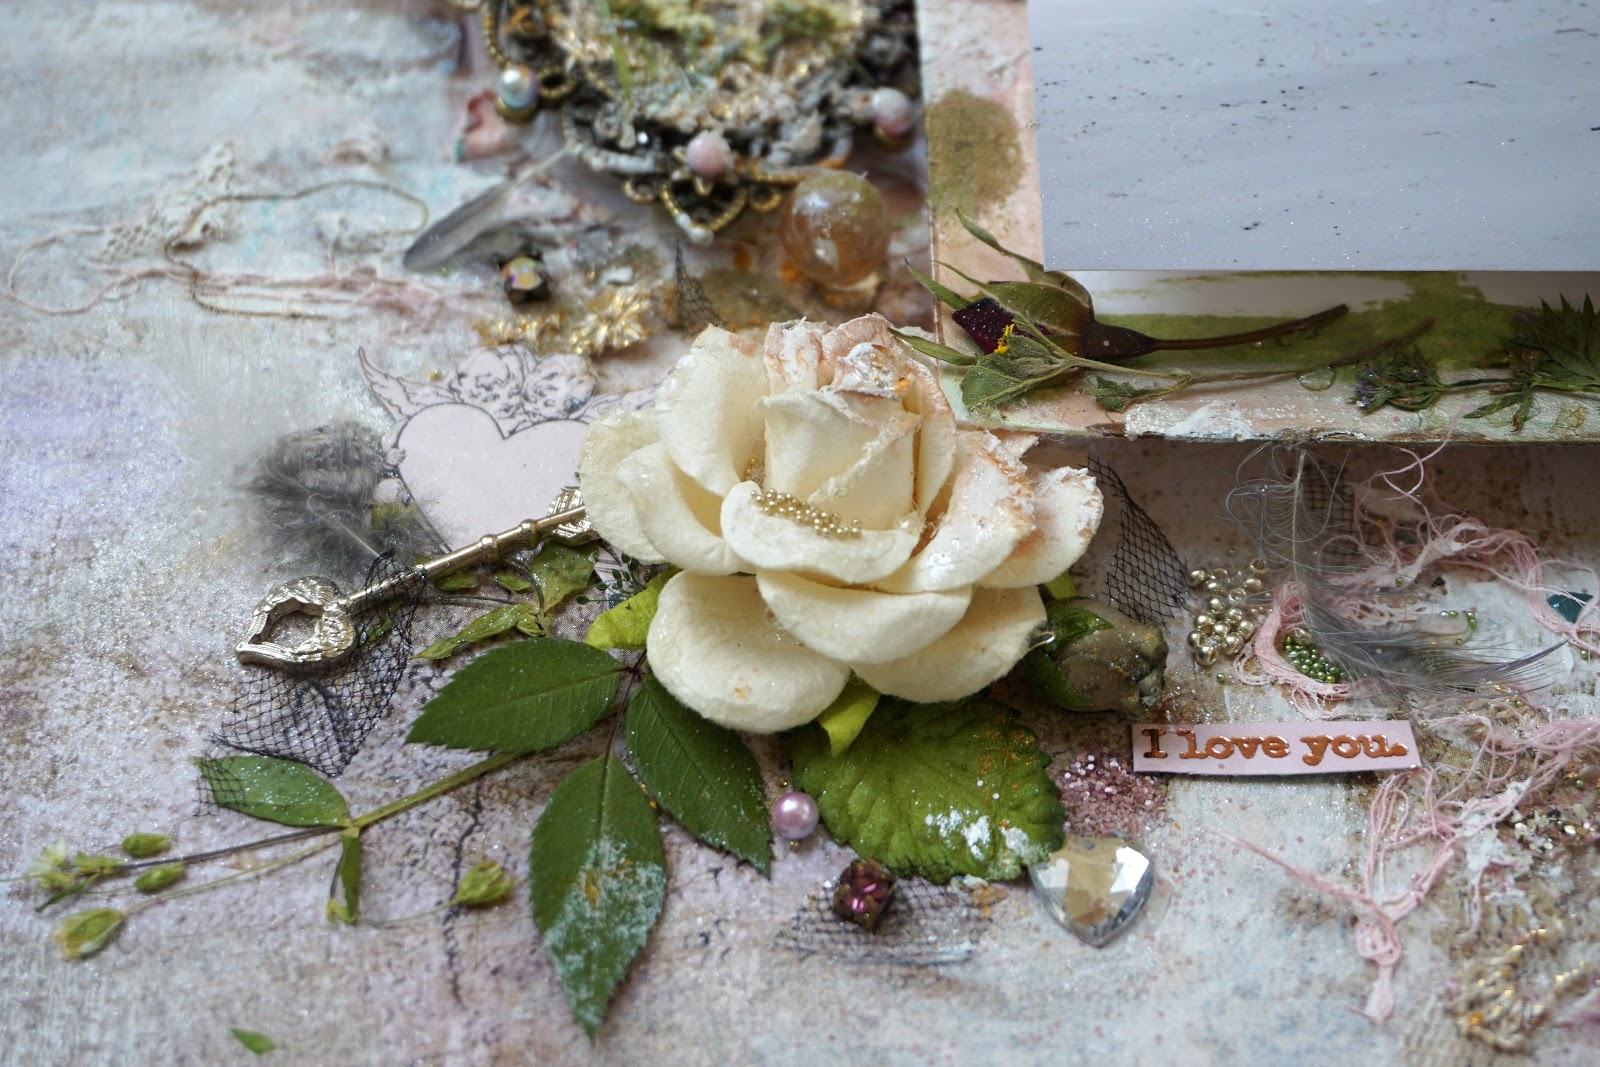
The metal rosette to left of Aron is by Finnabair, the little Eiffel Tower charm next to that is Vintaj. The metal key is by Tim Holtz, it's below the Prima rose. Next to the key is a small Celtic cross, from my stash.


I rubbed on silver mica powder on the page.


The flowers are from Prima. The rusty metal next to Nick's face is by Finnaabair.


I added some gold leaf, a few fairies cut from Graphic 45 Paper, and the gnome is from my stash. The bling is from Swarovski and Prima. Underneath the photo is metal by Tim Holtz: the peace token, heart, and flower piece. The chipboard is called Beautiful Board by Reneabouquet. I also want to say Juliya Tirskaya's pages are a huge inspiration to me.


The dried flowers are from walks I go on at the dog park with my dog Mack. The bee to the left of the rose is from some old Prima papers. 


Thank you so much for looking, and have a very blessed week!


Monday, June 4, 2018

True Love

Hi everyone! Melissa here with a guest design team page for Reneabouquet.com! I'm thrilled with all of the beautiful and high quality things I got to work with, especially Renea's own Beautiful Board. 

I've used one of my son and fiance's professionally done engagement photos. 


To make this page I first mounted the photo on watercolor paper. I used a piece of cardstock under the pic and attached it with double sided foam tape, then a piece of foam core board under that. There are two layers of foam core board between the watercolor paper and the bottom paper.


Using a Prima stencil and a credit card I put on a thick layer of texture paste. I used foam tape to put the photo on the page. I decided where all the BB was going to go, then took a photo of it to help me remember. I glued all the BB on with glossy accents,then added the big flowers.


Here's what I did with the BB:
1.- Sanded surface with a little sandpaper to help gesso to stick.
2. Painted texture paste on. Where I could I stretched out a strand and put it on with a brush, but the paste was pretty thick, mostly I just dabbed it on. 
3. Used a paintbrush to paint on gold paint.
4. Put on a layer of Rock Candy Clear crackle
5. Added more paint and gold mica powder in random areas.
6. Used glossy accents to adhere micro beads.
6. Using a detail brush I painted the inside edges of the BB with black gesso.


I painted the stenciled areas.


To add visual interest I added leaves,pearls,pink glass glitter, clear glass glitter, dried flowers, black tulle, gold metallic lace, seed beads, metal glitter, glass marbles, shells, feathers from the birdbath in my yard, and more.


This is a metal piece that I glued on gold lace to. I added some pressed flowers and pearls.
Thank you so much for looking, and have a great week!

Here's a list of the things I used from Reneabouquets shop:


Tuesday, May 29, 2018

Hi everyone! Melissa here with my second post of the month for Shimmerz Paints! I love the rich tones and sparkling effects I can achieve with Shimmerz! I have used an engagement photo of my son and his fiance.


To make this page I mounted the photo on watercolor paper. I used a layer of foam core board between the photo and the watercolor paper, and two layers underneath it and the background paper.The background paper is from Stamperia. I stenciled on some stars using a Jim Holtz stencil, and texture paste with an old credit card. I glued on the big Reneabouquets gears,and prepped them with gesso. I added two flowers from Prima. At this point I decided what colors to paint the gears and the paper. I used Penny 4 Your Thoughts Inklingz on the gears,and a mix of two colors on the paper: a lavender color Inklingz named Honeymoon, and Oakie Bear Blue Inklingz. On top of the two I added a light layer of the Penny color.

I added a thick layer of Ranger Clear Rock Candy on the chipboard. When it was dry, I added a small amount of I Love You Onyxly Inklingz to the edges of the chipboard, to help make the cracks more visible.


To add visual interest I added the following: micro beads, seed beads, charms, Tim Holtz metal, Finnabair metal, feathers from the bird bath in my yard, dried and pressed flowers, chain, gold leaf, black tulle, distress glitter, metal glitter,pearls, rhinestones, and more. I wanted to use some small chipboard hearts and stars in Tim Holtz shapes, but I only had the negative part of the chipboard left. I traced some new ones out onto watercolor paper,fussy cut them, painted them with Penny, and put crackle paint on.


The gold stars are Tim Holtz rub ons. The sand looking stuff is dry Ranger Frayed Burlap embossing powder. With my finger I brushed on gold mica powder over dry gesso to kind of tone down the detail of the background paper. All the blue on the chipboard and the page is the same mix mentioned earlier.


Thank you so much for looking, and have a great week!


Monday, May 21, 2018

Never Stop Dreaming


 Hi everyone! Melissa Larson here with my first page of the month for Shimmerz Paints!  I love the quality of these paints, I feel I can really express my love of nature with them.


To briefly describe how I made this page, I put texture paste on with a stencil, then mounted the photo on watercolor paper. I cut up chipboard and die cuts and glued them all around the pic. I put the flowers and some of the embellies on, then started painting. There are a lot of layers of Shimmerz and Inklingz. The gold is mica powder. 


Here are more details:There's chipboard at the top and bottom of the photo. I put a thick layer of Ranger Clear Rock candy over paint, then put more paint and gold mica powder on top.

 I used a lot of micro beads and glitter glass. 

I put a layer of foam core board under the between the photo and the watercolor paper, and then two layers between that and the Blue Fern paper.


The die cuts are made with Spellbinders dies. 


The big blue flowers are from Prima. The fairy at the top is from Graphic 45, I used a few others on the page. The feathers are from the birdbath in my yard, I've collected them over time, the birds leave them there in the water.


The little metal leaf at the bottom middle is from Vintaj. The title sticker is from 7 Dots. The truth metal tag is from Tim Holtz.  


I used a lot of pressed flowers. That yellow one is a buttercup. The little sun image to the left of the big blue flower is from Stamperia. 

Here's a list of the colors I used:
Inklingz:

Shimmerz:

I used some patina glitter glass, and mermaid shard glitter glass from Reneabouquets Shop.

Thanks so much for looking, and have a great week!